In this tutorial, I’ll show you how can you create GetResponse Double Opt In forms to make your email list more authentic and loyal that gives high conversion rates.
While single opt in also works and is still followed by many websites but the double opt in has its own advantages.
It does not only help in building up a community of loyal readers but gives more bang for your bucks as a study suggests that returning visitors are more likely to respond to your call-to-action as compared to new visitors. This is the reason that the return visitors result in a major chunk of the sales for the websites as compared to the new one.
Since this article is purely a tutorial, I won’t dwell on the pros and cons of single vs double opt in email forms as I’ve already dedicated it in a different article. If you’re interested in exploring more about this topic, feel free to follow the link.
As far as this article is concerned, let us quickly jump to creating a GetResponse double opt in form.
What is a Double Opt-In Subscription Form?
A double opt-in form is when upon entering the name, email address and any other mandatory information, the subscriber receives an email with a link to confirm if he really wants to subscribe.
This is not something strange and I’m sure you must have also encountered this form of subscription. It looks something like this:

As opposed to the single opt-in forms, where a visitor subscribes just by entering his information in the form, the additional check ensures that someone else hasn’t entered the subscriber’s information.
Once the visitor successfully subscribes to your list, you can send them periodic newsletters to stay in touch with them. Read How to create a newsletter in GetResponse? for more information about this topic.
Complete Step-By-Step Prcess Of A Working Double Opt-In Form
Just in case you have never ever subscribed to a website that uses a double opt-in form, here is the complete step-by-step workflow of how the double opt in email subscription form works.
- A subscriber enters his details in the subscription form and subscribes
- An email with a confirmation link is sent to the subscriber’s email address
- The subscriber clicks the confirmation link to confirm his subscription
- Clicking the link does two things. First, it will redirect you to a Thank You page and second, it will shoot another confirmation email showing that you’re now subscribed to the list
This whole ordeal of the subscriber going inside his mailbox and clicking the confirmation link has an advantage and that’s the email clients such as Google, Hotmail, etc. lower their suspicious bar, therefore, lesser the chances that your future emails will end up in the subscriber’s junk folder.
Furthermore, looking at the steps above, there are three different elements that you need to customize/create for a GetResponse Double Opt In form. These are:
- The Opt-in form
- Thank You page and
- The Confirmation Email.
Also Read: How to make your GetResponse email campaigns GDPR Compliant?
How to Create a GetResponse Double Opt In Form
Here’s how you can create a double opt-in form in GetResponse. All you have to do is:
- On the main dashboard, click Form & Surveys right from the main menu.

- Click the Create Form button

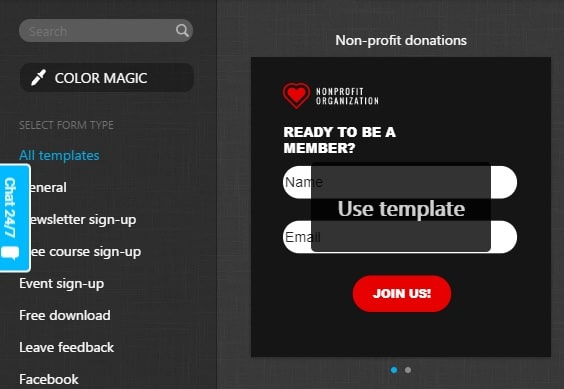
- We’ll keep it simple and won’t dwell in the nuisance of creating a GetResponse contact form from the scratch. Therefore, we’ll select a template straight away by scrolling a little bit down and then clicking the Use Template option that appears when we hover on any template.

- Open the form settings by clicking the Settings link on the top-right side of the screen.

- From the pop-up window, turn on the Confirmed Opt-in option.

- Before clicking the Save button, note the email list (in the Choose List field just above the Confirmed Opt-In field) to which the form is associated. You may need to create a list first to associate it with the form. Since this is out of the scope of the article, we won’t discuss it here
Modifying the Thank you Page
For better user experience, of course, it isn’t fair to keep your subscribers hanging in the middle. What this means is that as soon as they subscribe, you should tell them what’s the next step.
If they’re already subscribed or do they need to take another step to ensure that they’ve been enlisted.
So in order to redirect visitors to the Thank You page, it’s important to modify it accordingly and here’s how you can do it.
Redirecting Subscribers to the Thank You Page
First, it’s important to redirect your subscriber to the thank you page. to do so you need to:
- Open the form’s settings by clicking the Settings link from the top-right side of the screen.

- Select the option of Default in the Choose Thank-you page field.

- Click the Save button.
Now, go to the Thank you page to alter the text in it so that your subscriber knows the next step.
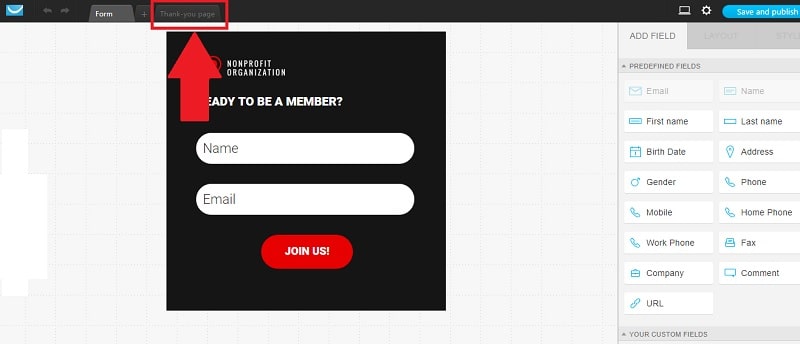
- While staying in the form design window, click the Thank-you page tab.

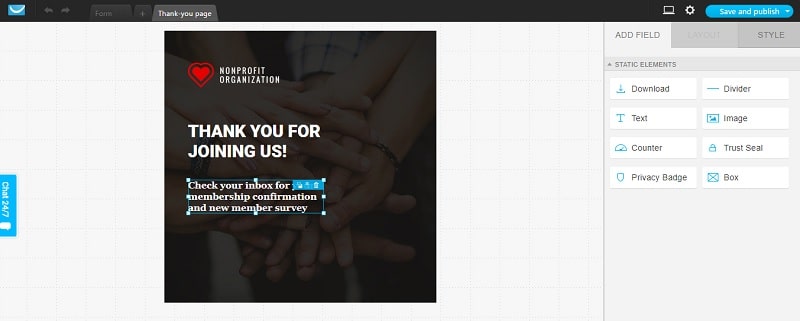
- If there’s a need, edit the text on the Thank you page giving clear instructions to your subscribers.

Editing The Confirmation Message
A distinction that we need to draw here is that there will be two confirmation messages in this whole process. The first is the Thank You page that we have already seen how to edit and the second is the confirmation message sent to the mailbox.
As a final touch, you may feel the need to edit the confirmation message that your subscribers will receive in their inbox. A little customization goes a long way and making the Confirmation or Thank you message more personal and gratifying will make you more credible and your words more compelling in the eyes of your subscribers.
Besides, you also need to match the overall tone and feel of your own blog so you cannot rely on ready-made or template-based messages.
Luckily, GetResponse does provide you with the option of customizing your confirmation message on the Thank you page. Here’s what you have to do:
- From the Main Menu at the top click the Lists option.

- Click the three-dotted button in front of the relevant contact list and then click Settings.

- From the different tabs in the List Settings window, click the Confirmation Message.

- Edit the fields that you want to change. These fields already have pre-built templates of subject lines and the main email body message so that you don’t have to write anything from scratch. Just choose any one options from the list. However, if you want to give your own spin, which I recommend, you can also do that by clicking, Add Custom Subject Line underneath the Subject Line field and Confirmation Message link just below the Body Template field.
- Click Save confirmation message button to save your settings.
Final Thoughts
I hope you find this GetResponse Tutorial quite helpful. Just remember one thing, although, the double opt-in may rob you of some subscribers, but in the long run, you will end up with a quality list of subscribers who interact and respond to your emails.
Therefore, subscribers who sign up through the double opt in form are more valuable vs those, who signed up through the single opt in.
Granted that there are certain advantages of Single Opt-in as well but since the double opt in and slightly larger number of marketers follow this approach, the double opt in is suggested as best practice to collect user data.
Before signing out, just in case you haven’t yet subscribed for GetResponse, you can easily by following the link below or if you want to know more about this top-of-the-class email marketing software then you can read my detailed Complete and Detailed GetResponse Review. Hope you’ll find it useful.


5 thoughts on “How to Create a GetResponse Double Opt In Form?”
Comments are closed.