In this brief tutorial, you will learn how to create a newsletter in GetResponse.
If after reading my GetResponse Review you went ahead and signed up for a free trial account and now you’re wondering that how to get started with GetResponse then you should follow this tutorial and start sending newsletters to your subscribers straightaway.
But why is sending newsletters to your subscribers so necessary?
Well, we’ve already discussed that why email marketing and sending emails to your visitors or email contacts on a frequent basis is a great way to promote your blog or earn commissions through affiliate marketing.
In fact, if done right, this is one of the best sources of creating a passive income stream for yourself where you have to work once to collect good quality leads, and then the rest is done on a complete auto-pilot basis.
So, in this tutorial, you will not only learn how to create a newsletter but also schedule them so that they can be delivered even when you sleep.
So lets our tutorial with a very brief definition of what email newsletters really are?
What is an Email Newsletter?
At the very core, a newsletter is a periodic correspondence that is issued and sent to the members to update them about anything.
Similarly, when you use an email to send out the newsletter, it becomes an email newsletter.
What are the advantages of sending newsletters to your subscribers?
Many blogs send newsletters to their subscribers on an ongoing basis.
The primary benefit of doing so is that it increases the number of visits to your blog.
Even better, it ensures that you get a steady stream of “repeat visitors” and based on the experience of all the marketing gurus, the returning visitors’ ratio is one of the most important factors to drive your sales up and skyrocket your search engine rankings.
If you want to know why then here’s a quick question. Have you ever bought something from a website you visited the first time?
I’m sure the most likely answer would be NO.
And that’s the purpose of email marketing is. You try to create a feeling of familiarity with your visitors so as to ultimately entice them to take a particular action.
So once we’ve established and agreed upon the importance of sending out periodic newsletters to your email list, it’s best to learn how you can actually do it in GetResponse?
How to Create a Newsletter in GetResponse?
GetResponse allows you to create a newsletter using ready-made templates or by creating your own design and starting from scratch.
The templates can also be customized using the drag-and-drop feature that makes it easier for non-techies to create attractive newsletters that result in higher conversion.
Remember, the ultimate purpose of sending out newsletters to your subscribers is to make them take an action and in most cases, this action is making a purchase.
If instead of the aesthetics, you prefer people paying heed to your content then you can start from ground zero, get rid of the tacky stuff, and create a simple newsletter with text-based content.
Again, even here the GetResponse provides you with a couple of choices. Either you can use the WYSIWYG rich-text editor which allows you to create content and apply the design elements on the go with the help of some clicks. If you’ve used WordPress then I’m sure the WYSIWYG is not something new for you.
Additionally, if you want to apply the HTML skills of your own, you can do that as well.
Once you log in to your account and assuming that you’re using the modern interface (as GetResponse has recently changed and modernized their interface), you can create a newsletter by following the below steps:
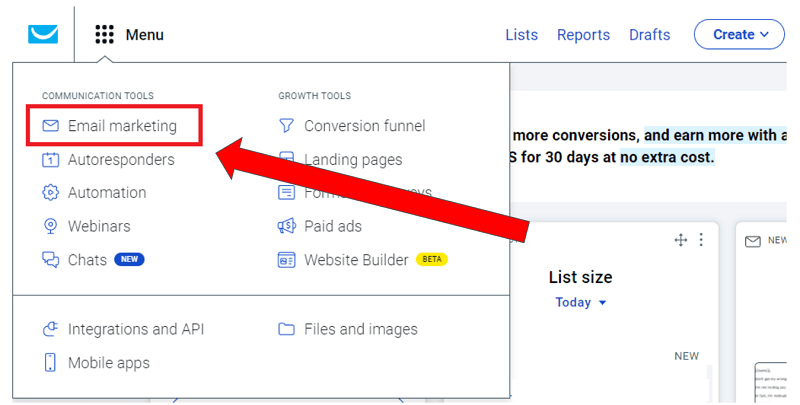
- On the main screen, on the top left side, click the Menu and then the Email Marketing link.
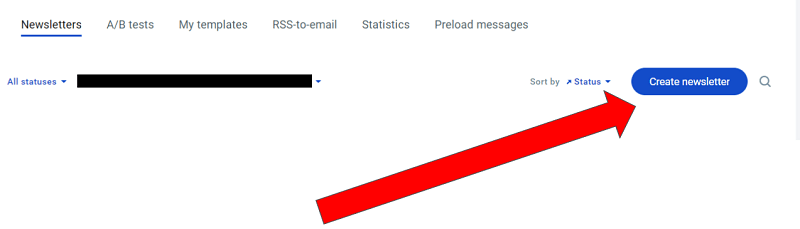
- Click the Create Newsletter button.
- Enter the name of the newsletter (for e.g. Test Newsletter in this tutorial)and specify the list that will be associated with it. Although you can send a newsletter to multiple lists (see point 6 below), however, in this section, you need to specify a single list. This will be the list you’ll access to see the statistics of your email newsletter and doesn’t actually have to do to whom the newsletter goes to.

- Enter the From and Reply-to email addresses. These are the email addresses that you subscribers will receive email from and send replies to respectively.

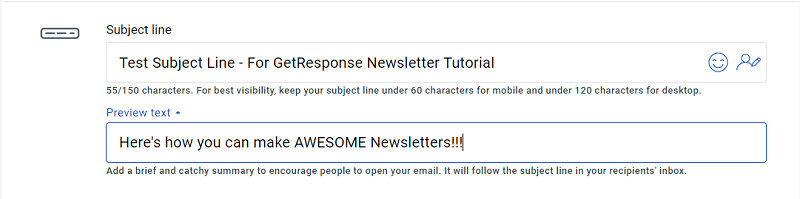
- Enter the Subject Line and a Preview Text that your contacts will see in their emails.
- In the Recipients section, here’s where you can assign the list to whom the newsletter will be forwarded. You can choose multiple lists. You can also create and assign Segments to the newsletter.

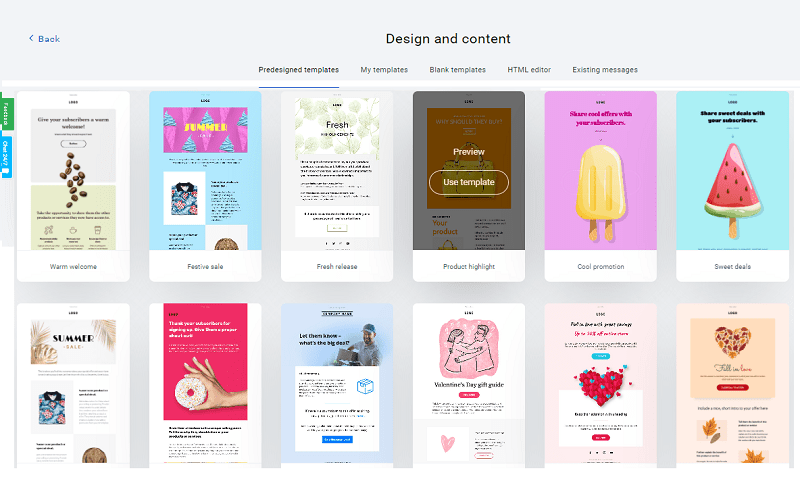
- In Design and content section, you can customize your newsletter either using a pre-designed template or a blank one. Moreover, if you prefer HTML-based editing, you can do that as well. Just click the Design Message button.

- Choose from the Predesigned Templates to totally blank templates or edit the core HTML of your newsletters. You can also use previously saved templates from My Templates section.
- Set up the tracking of the basic “vitals” of your newsletter and see its performance in the Tracking section, set up the following options:
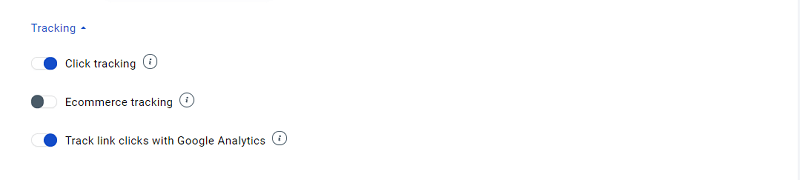
Click Tracking: Track the clicks on the links of your newsletters
Ecommerce Tracking: Track what your contact do on the page followed after clicking the link. This option is to trigger any automated workflows that you may have setup. For e.g. you can design a workflow in case your subscriber abandons a cart, make a purchase, etc. You need to add GetResponse code snippet for this option to work effectively
Track links clicks with Google Analytics: This option tracks traffic from your newsletter to your website. Needless to say that you need to add the Google Analytics configured on your website for this option to work effectively - In the optional section, Tracking you can upload your newsletter message to the social media websites like Facebook and Twitter once it’s sent to your subscribers.

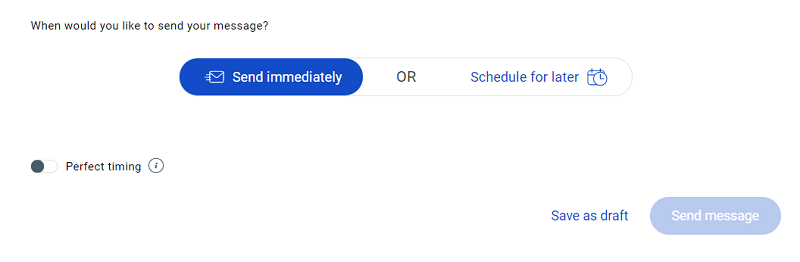
- In the end, you have three options to send your newsletter. Either you can Send it immediately. Or you an Schedule it at a later date. Or you can use the Perfect Timing option and rely on the GetResponse’s AI t o send emails to the list (on individual basis) whenever there inner algorithm considers it to be perfect. Once everything is set up, click the Send Message button.
The ultimate goal of an email marketer is not only to hurl emails to the subscribers. That’s only a means to an end. The real objective is to compel your readers to take meaningful actions driven through your email.
The best feature of email marketing tools (including GetResponse) is not the ability to design eye-catching emails. In fact, in my opinion, it’s the ability to track the performance of their newsletters to confirm if it achieved the objectives for which it was sent to the subscribers.
Basic Metrics Provided by GetResponse
With GetResponse, you can analyze the open rate, click rate (or as some people say, Click Through rate), unsubscribe rate.
Let’s have a look at each of the above metrics a little bit more in detail.
#1. Open Rate
It’s the percentage of your subscribers who actually opened your email. Of course, the very first action that you’d want your subscribers to take is to actually open the email to read the content of it.
GetResponse shows the email addresses of the subscribers who open the newsletter.
#2. CTR (Click Through Rate)
It’s the percentage of the people who actually clicked any link mentioned in the email. The higher the click-through rate, the better it is.
Just like the open rate above, GetResponse shows the email addresses of those contacts who click through your links as well as also what link was clicked (in case there are more than one link in an email).
#3. Unsubscribe Rate
This is the percentage of the people of preferred “cutting ties” as they do not want to receive any further emails by clicking the “Unsubscribe” button right beneath the main content of the email.
Normally, it is perceived as an unethical move not to provide your subscribers with the Unsubscribe option. In a way, this feature is quite useful as it helps in cleaning up your email list.
Remember, GetResponse charges you based on the number of subscribers in your list. So if you keep shooting emails to those who do not want to be a part of your subscription list then you’re wasting resources. So it’s best to get rid of them and make space for the new better ones.
Therefore, the Unsubscribe option helps make your list efficient by pruning it.
Unlike the open rate and the click-through rate above, GetResponse (for obvious reasons) does not show the email addresses of the subscribers who unsubscribed from the list. Moreover, GetResponse also makes sure that when emailing the next time, the unsubscribed email addresses do not show up in your list again.
So this list management is really helpful in saving your time.
How to Check the Newsletter Statistics in GetResponse?
Once we know what each metric means, it’s best to discuss the navigation and how you can check out these vital statistics.
In order to do so, follow the below steps:
- Click the Reports link from the top left menu.
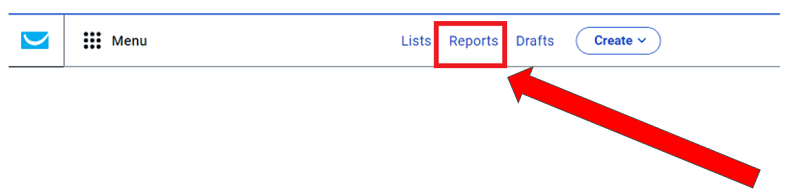
- Set the Date range and select the Newsletter in the relevant fields. You can also specify a single List by selecting the specific list fro the All lists option.

- GetResponse shows email performance in different formats such as:
a. Summary data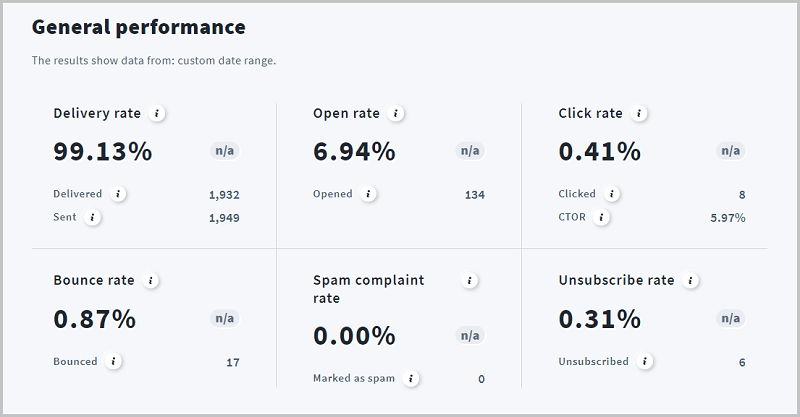
b. Graphical data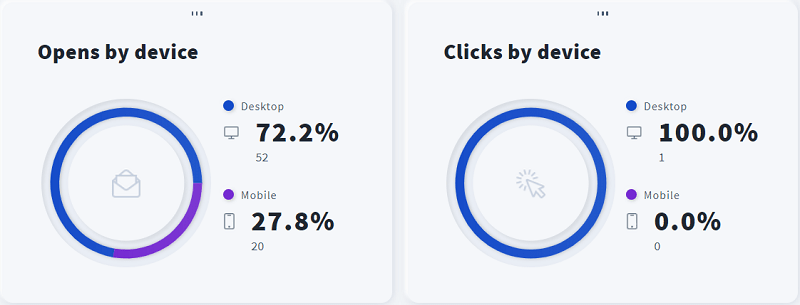
c. Tabular data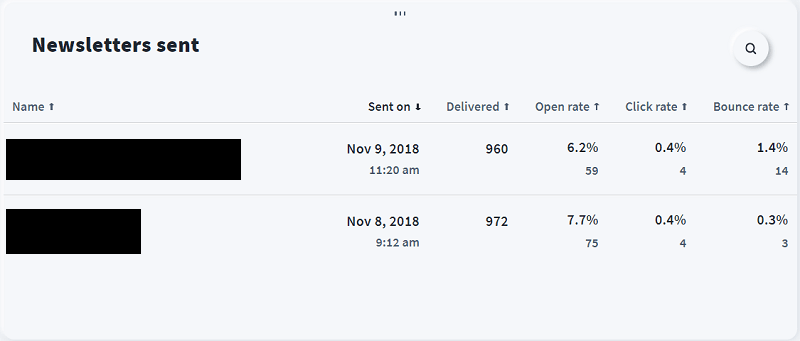
Final Word
Finally, that’s how to send newsletters in GetResponse and not just send it, but also schedule and track their the performance.
As discussed in the previous article, email is the most economical source of marketing and getting your word out there. So if you haven’t started investing your time in building your own email list then I’d suggest you to start thinking about it seriously.
In fact, why not start a free 30-days trial and see if it’s really your cup of tea. You just have to follow this link: Start your 30-days free trial.

2 thoughts on “How To Create A Newsletter In GetResponse?”
Comments are closed.